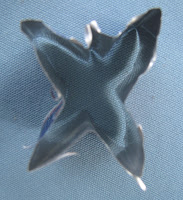
As for the lantern, well, making it was easy enough. I've seen tutorials online about filling the can up with water and freezing it so that the can is more rigid to be able to make the cuts but I didn't really think this was necessary. I just used a really sharp box cutter so I didn't have to saw the metal, but rather the knife went through the metal like butter. I still got some wonky cuts and they started straight but ended up in a spiral pattern. I did find that it was easier to make the initial insertion for all the cuts first because this takes a tad more muscle than making the downward cut, and when you've chopped up the can you lose structural integrity pretty quickly. I saved the pop top on the top of the can and just strung it with fishing line for a no-see hanger and then cut one of the sections out to insert a tea light. The bottom of the can is rounded and I've seen suggestions to turn the can upside down in order to have a flat surface for a candle, but then you lose a hanger. You could use a glue dot or even a dab of candle wax to secure the tea light in place. You could even use those battery-operated tea lights for safety. I still found the lantern to be cheap looking and still sharp and jagged so not to be used around kids.
The last thing I made was a scrapbooking tag embellishment. For a raised letter tag, just cut the shape, draw the lettering on the back with a pen (remember, backwards!) and then punch a small hole if desired. You could also draw the lettering on the front and then cover with paint and wipe off the excess to get a stained look.


I like the scrapbook embellishment... cute idea!
ReplyDeleteThe can lanterns look good in the dark :) pretty neat idea. Thanks for stopping by my blog and commenting. Have a great weekend!
ReplyDelete