A journal

Thanks for visiting me at Experiment MOM (Mother of Multiples). My digital Scrap for Hire business, ScraPicts, is coming soon so please check back with me again or Click the Follow Me button on lefthand side of my blog.

Sunday, March 31, 2013

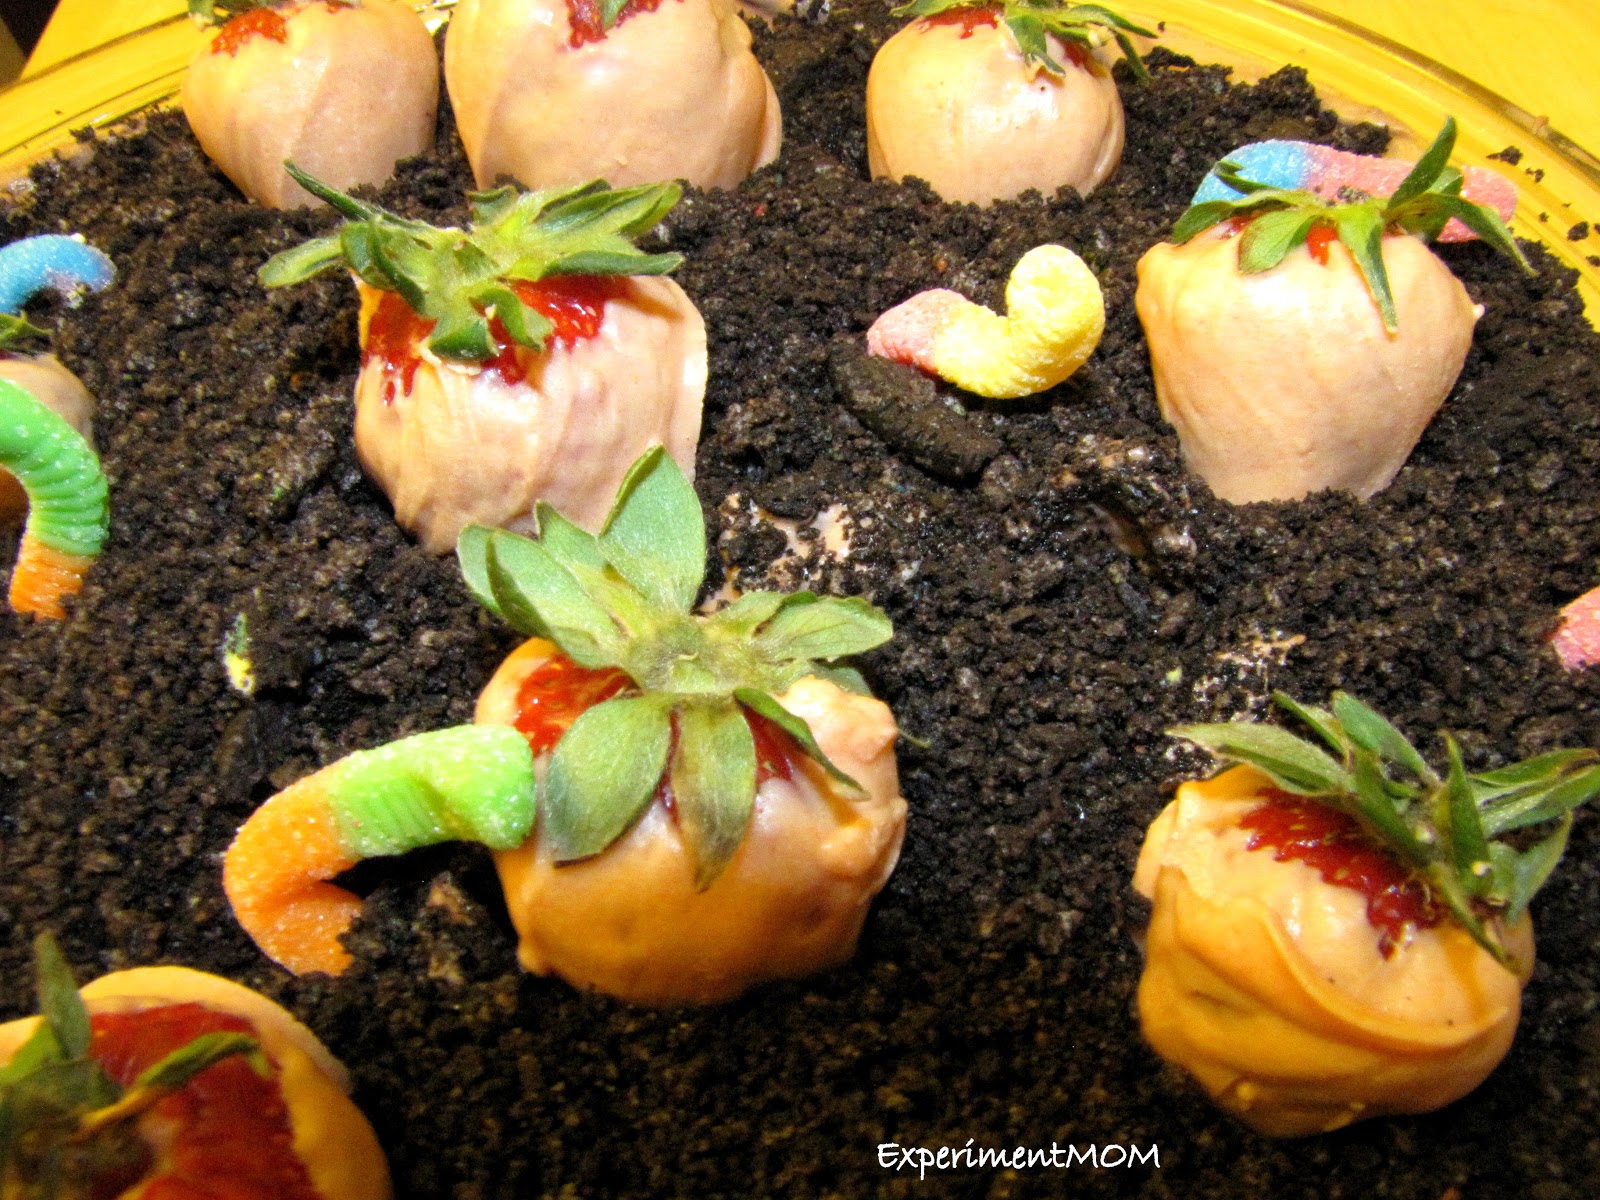
Chocolate-dipped Strawberry Carrots for Easter

Hoppy Easter everyone!  Last night my friend Sarah came over for strawberry dipping. She had seen these adorable orange chocolate-dipped strawberries on the cover of the Harry and David catalog and so we set out to recreate them. Also Sarah HAD given up sugar for lent but let's just say the fast was over a tad early!!!

Harry and David Version:

So this is what we did.  Some notes ahead of time.
1. Get medium strawberries and if you are picking them yourself, make sure to keep the leaves and even some stem on them to grasp while dipping.
2. Wash and dry thoroughly before dipping. Bring to room temp if they have been refrigerated.
3. Set out cookie sheets with parchment for drying dipped strawberries
4. We got about 24 strawberries out of a double recipe of chocolate plus a bunch of peanut butter filled pretzels
5. Making the little carrot lines seemed difficult.  Read on..

Ok here is the recipe we used for making the double recipe of chocolate: 2lb white chocolate morsels+ 2tablespoons shortening.  Place in double boiler over med heat to melt and stir.  Add food coloring to desired color.  Don't bother using toothpicks to hold strawberries.  They will just pull right out. Grasp strawberry by the stem and dip to cover. We found the chocolate in the double boiler cooled pretty quickly so some of our berries were a tad lumpy (but still delicious!) and you have to stir the chocolate and dip quickly.  Place on parchment to dry.


We contemplated making the carrot lines but decided against it.  We felt like if the chocolate were melty enough to drizzle from a pastry bag or snipped ziplock that it would be too hot to handle and if it were cool enough to handle it wouldn't be drizzly enough.  Maybe we could have used a fork to splatter the chocolate on but it certainly wouldn't be very controlled.

Since we are heading to a friend's house for Easter, I decided to make a Carrot Garden Dirt Pie.  I used this recipe for the "dirt." I've forgotten where i read this recipe originally but there are recipes all over the internet that are pretty similar.

14oz-16oz oreos
8oz cream cheese
1/2 butter softened
1 cup powdered sugar
1/2tsp vanilla
5.9 oz pkg instant pudding chocolate (or vanilla)
3 cups milk
1 pkg cool whip

1. Use food processor to chop oreos (cream and all) into small pieces.
2. Cream together cream cheese, butter, sugar and vanilla.
3. In large bowl add milk to pudding and mix together.  Fold in cool whip.
4. Add butter mixture to Pudding mixture and mix well.

Alternate layers of cookies and pudding in a large glass pan. Top with layer of cookie dirt. I used a deep dish casserole dish and it just barely fit everything!

To decorate, I used a wine stopper to depress cone-shaped depressions in the "dirt" to set the "carrots" into.   added some gummy worms for fun!  Enjoy!!


Wednesday, March 27, 2013

Natural dyes for Easter Eggs

Yeah for natural dyes. You might recall that last august I tried to find some natural food dyes that would dye some frosting for my kids' bday cake. It wasn't overly successful.  But around comes Easter and natural dyes are all the rage on pinterest and facebook.  I knew I had to try them out!  So i sent the hubby off to the grocery store with my list: 8-12 large yellow (spanish) onions and a head of red cabbage.  Luckily I have turmeric in my spice cabinet and vinegar always on standby.  I also did purchase some liquid chlorophyll from Whole Foods around St Paddy's Day but you'll see this is unnecessary.  All measurements and times are approximate and you'll want to experiment on your own to get the colors you desire.

Here are my beautiful results!  From top left to right: Onion dye 2-3 hours room temp and oiled with olive oil, Cabbage dye room temp 2 hours, Cabbage dye + turmeric powder boiled then refrigerated 2 hours. Bottom Left to Right: turmeric dye, Cabbage dye refrigerated, Cabbage dye + baking soda room temp


Red Cabbage: Isn't it pretty? Cut 1 large head of red cabbage into chunks and place in large pot. Add abt 6 cups water and bring to a boil.  Reduce heat and let simmer 15-30 minutes or more.  Cool before use. Strain out cabbage. And add 1 tablespoon vinegar per cup of dye. Place cooked eggs in dye at room temp or in fridge.  Dyes pretty BLUE.  Add 1/2 tsp per cup turmeric and microwave. Add egg to dye GREEN.  No need to use liquid chlorophyll.  Add baking soda (watch out, it will FIZZ) to dye eggs TURQUOISE.


Yellow Onions: Remove skins only from 8 large onions.  Place in pot and add 3 cups water. Boil  and then simmer for 15-30 minutes or more.  Cool to room temp, strain and place liquid in shallow pot.  Add 2 tablespoons vinegar and add uncooked eggs to dye.  Bring to a boil and cook 1 minute then take off heat and let come to room temp. Place eggs in dye at room temp or in fridge. Dyes dark REDDISH-ORANGE.

Also you can wrap some hardboiled eggs in the remaining skins tightly (i used a paper towel) and refrigerate.  Adds a fun texture.


Onion Wrapped eggs after a couple of hours

natural dyes (left onion, middle cabbage, right cabbage + baking  soda

So I did try using liquid chlorophyll and it does dye eggs GREEN (see below) but it was grainy and the color didn't seem especially colorfast (ie I think i would remove it if I wiped the egg).  The YELLOW below is Turmeric boiled in water and add a little vinegar.


beautiful eggs
So I never got a nice purple or red so I'll have to work on that - next year (beets, pomegranate, grape juice) etc!  I also will donate several of my leftover onion to friends for use in recipes and the leftover dyes I will also pass along as I know the shelf life will be pretty short and I am done dying eggs for the season.  These eggs will be headed to the deviled egg factory in a couple of days (YUM).  Hope you get a chance to try dying eggs naturally!

Monday, March 25, 2013

Easter Egg hunt pictures and my first real scraplift

Hey all. Do you know what a scraplift is?  Well, basically it is replicating someone else's layout with your own spin and pictures.  I would call it "copying" but since the scrapping community accepts this practice I will call it scraplifting. I wasn't overly inspired in laying out some pictures of the kids from this past weekend's easter egg hunt so I went on a hunt of my own - to find a layout that I liked that would showcase a few of the pictures. On DigiShopTalk's gallery, I found this cute layout by Celeste.  Her credits are as follows:

Mye De Leon & The Ardent Sparrow Sew Happy kits
Sketch template from Simple Scrapper's Premium Membership


Now here is my spin:

The idea is not to copy it exactly but to use it as inspiration for your own layout. I thought it came out cute.  I love The Urban Fairy's Butterfly Kisses purples patterned papers and they are perfect for easter scrapping!!

Here are the credits for the page:

The Urban Fairy elements from – RandomIt, PLifeJournalCards, FizzlePop, ButterflyKisses, JustLove

Veronica Spriggs Straight and Narrow, Erika Zane Grow, SugarPlum Paperie EveryDay Memories, Tracey Stroud PocketFullAddon, Serendipity ScrapDesign, Gennifer Bursett from An Innocent Heart collection.


Saturday, March 23, 2013

Easter fun - Turmeric and Lemon frosted Cupcakes

What? a non-scrapbooking post?  LOL. Yep this week i'd like to get back to some lifestyle stuff- crafts and such.  Last night I had to make a bunch of cupcakes for our annual Spring Fling which is an egg hunt, crafts and activities for our mothers of multiples club. I knew I wanted to make an easy bunny rabbit but wasn't sure about the frosting. I am on a natural food coloring kick right now so I thought I would see how turmeric colored and flavored some cool whip I had.  It was a beautiful yellow shade and the flavor needed - something! well I had a lemon hanging around and I thought that maybe those two flavors might melt together pretty well.  So I squeezed (squoze?) it and added just the tiniest little amount of lemon juice to the whip. It did very slightly curdle the whip which gives it a fun texture, and it tasted - well - pretty good. So if you want to replicate it, try adding the turmeric slowly to some cool whip or other whipped cream frosting, and mix well and taste as you go. Then add lemon juice a very small amount at a time until you get the taste to your liking. Ok I haven't seen Turmeric Lemon Frosting anywhere else on the internet so if you come across something, i'd love to see it.

Here is a picture of three bunny cupcakes I made - the one on the left is just cool whip. The middle is cool whip with just lemon juice and the right cupcake has the turmeric lemon frosting.  I used the pastel candy corn as ears and yogurt covered raisins (in easter colors) for the mouths (unfortunately neither of these have natural dyes - only fake dye...ugh).


And of course we saw the Easter Bunny with just about expected reactions. I hope they are not scarred for life.


linkwithin

Related Posts Plugin for WordPress, Blogger...